
Karen
I've
decided to do a quick catch up by doing some tags with some of my favourite
photos from the last 12 months, to pop into my album here and there.
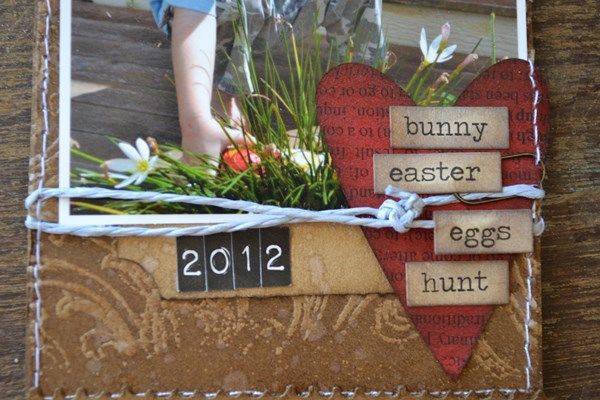
This was Ash last Easter looking for eggs ... well actually it was a practice run, just in case we had bad weather Easter morning which we did, so I was lucky.

And a little close up and a few details. The heart is done with a page out of an old book. I've coloured it first with distress stain, then sealed both sides of the paper using glue and seal, just to help protect my photo. The word stickers are from the Seasonal Chit chat pack - these come in handy for all sorts of seasonal occasions, from Valentines day, Easter and Christmas.
Products Used:
Seasonal Chit Chats
Paper String
Trimmings
Barn Door Distress Stain
Tattered Banner Die
Hearts Die
Vintage Lace Die
Glue N Seal
This was Ash last Easter looking for eggs ... well actually it was a practice run, just in case we had bad weather Easter morning which we did, so I was lucky.
And a little close up and a few details. The heart is done with a page out of an old book. I've coloured it first with distress stain, then sealed both sides of the paper using glue and seal, just to help protect my photo. The word stickers are from the Seasonal Chit chat pack - these come in handy for all sorts of seasonal occasions, from Valentines day, Easter and Christmas.
Products Used:
Seasonal Chit Chats
Paper String
Trimmings
Barn Door Distress Stain
Tattered Banner Die
Hearts Die
Vintage Lace Die
Glue N Seal
----------------------------------------------------------------------
Mandy
Is anyone looking at Easter 'products' to scrap some Easter
photos? I love to put a couple of Easter LO's out on display over the holiday
break, and there's always that 'I remember that!' remark - and a bit of a chat
over the particular Easter gone by.
I've always loved this little photo of Hannah and have wished it were better quality, constantly overlooking it because of that problem. Finally I've come to the conclusion it shouldn't matter - its still a lovely memory (in her ears and dressing gown ready for a hunt!) therefore worthy of scrapping - so I created a little scenario of Hannah in a nest full of eggs and the little Easter bunny on his rounds! Just a bit of fun!
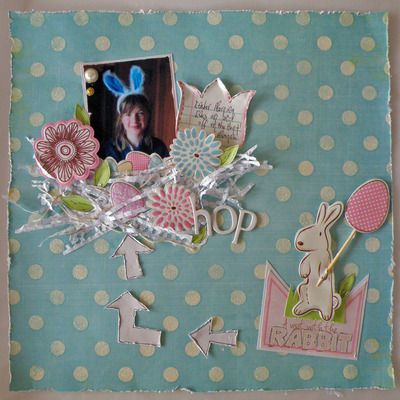
The background paper is fabulous WRMK Cotton Tail Glitter Polka Dots Paper
And the nest is made up of a mixture of thin strips of notebook paper binding that has been torn off, string and handmade little leaves made from WRMK Simply Spring Textured Cardstock (the WRMK's cardstock is fabulous- I use it as a preferred cardstock ) The stickers are now sold out, but look
at Cotton Tail range left to see what you could use WRMK Cotton Tail
Products
) The stickers are now sold out, but look
at Cotton Tail range left to see what you could use WRMK Cotton Tail
Products

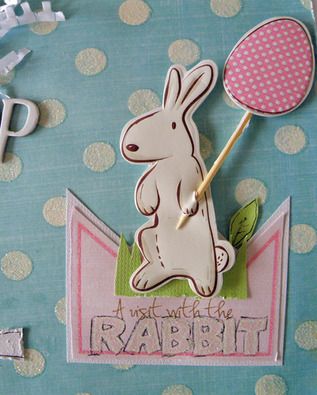
The little tulip journal block and the 'A visit with the Rabbit' block that Easter Bunny is standing on - can be found HERE
WRMK Eggshell Cardstock used for the little arrows and to mount the photo.
MME Brads
White Jewelry Box Thickers
I've always loved this little photo of Hannah and have wished it were better quality, constantly overlooking it because of that problem. Finally I've come to the conclusion it shouldn't matter - its still a lovely memory (in her ears and dressing gown ready for a hunt!) therefore worthy of scrapping - so I created a little scenario of Hannah in a nest full of eggs and the little Easter bunny on his rounds! Just a bit of fun!
The background paper is fabulous WRMK Cotton Tail Glitter Polka Dots Paper
And the nest is made up of a mixture of thin strips of notebook paper binding that has been torn off, string and handmade little leaves made from WRMK Simply Spring Textured Cardstock (the WRMK's cardstock is fabulous- I use it as a preferred cardstock
The little tulip journal block and the 'A visit with the Rabbit' block that Easter Bunny is standing on - can be found HERE
WRMK Eggshell Cardstock used for the little arrows and to mount the photo.
MME Brads
White Jewelry Box Thickers
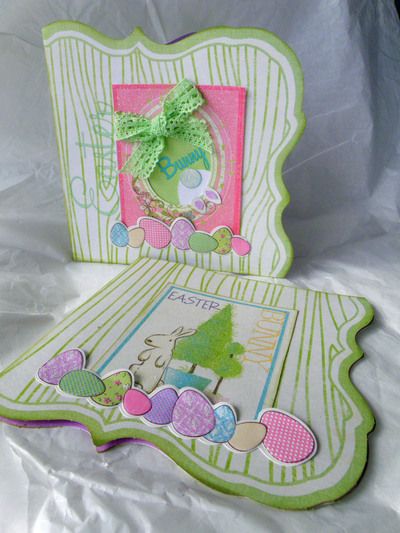
AND what about some more Easter Cards!!
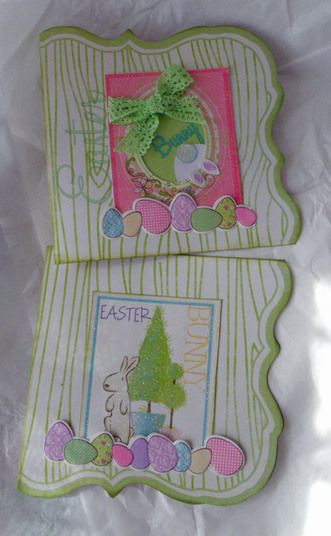
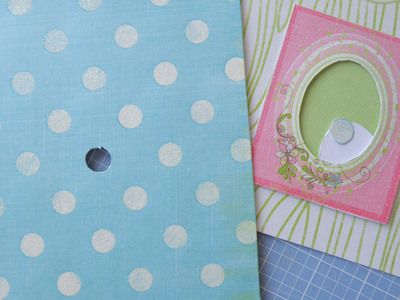
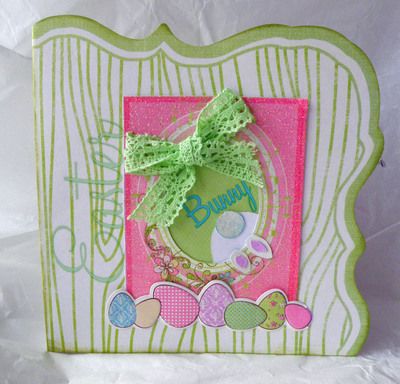
This time 'Easter Bunny' features with WeRMemory Keepers and by using one 12x12 diecut paper, two shaped cards are formed.
Step 1
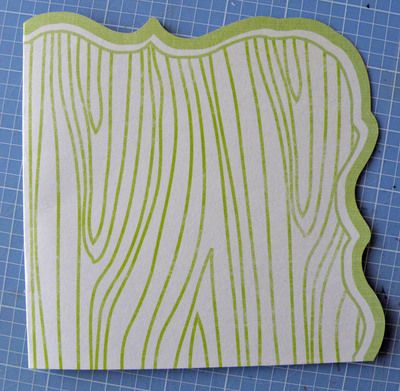
Cut Cotton Tail English Garden Diecut 12x12 in half
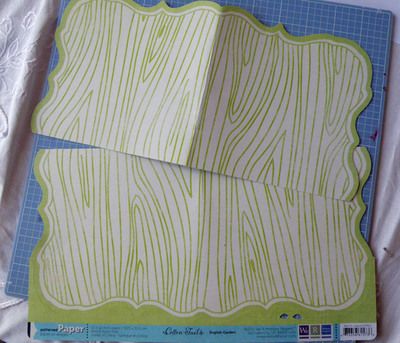
Step 2
Fold in half
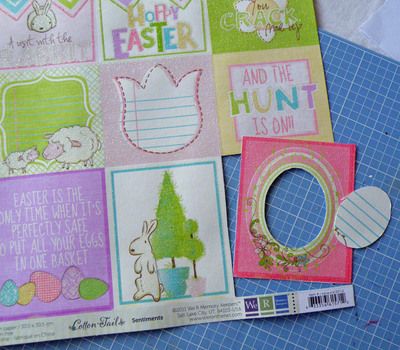
Step 3
Using Cotton Tail Glitter Sentiments 12 x12 - cut out the little oval window block for the first card, (and the little bunny block to the left of it as this is for the second card) Cut out the little oval centre, and keep it aside - we need that for bunny's little bottom!
Step 4
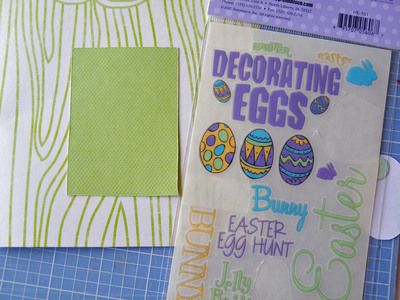
Cut out a little rectangle piece of Simply Spring 'Grass'Cardstock (its to back the oval window)
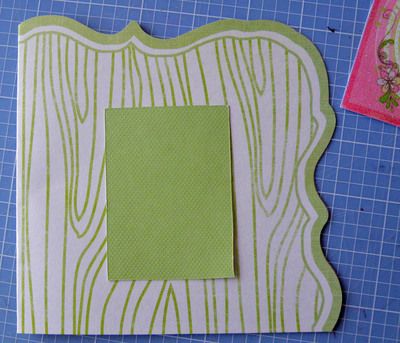
Step 5
Have a little 'fiddle' where the paper piecing would go. No sticking down... Turn the little cut out oval piece over to its white side and place under the lower corner of the frame
I had this wonderful blue Cotton Tail Glitter Polka Dots paper - and cut out a little glitter dot - just for his tail! ( its not a waste of a 12x12 sheet because I'll use this paper for something else and cover that little dot space up with a photo or something )
Step 6
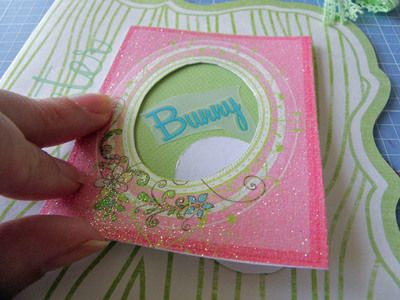
Time to use those fabby Easter Rubons using the green 'Easter' word and the blue 'bunny' word.
Step 7
Try measure up where the words would go, rub them on and start to stick down.
Step 8
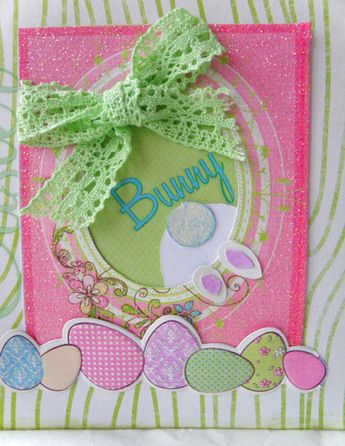
Cut out some little white oval feet and tiny pink soles to go on the inside of the feet, then dangle them just outside the hole. Add a lace bow and a line of Easter Egg Stickers
Step 9
A sentiment from the Cotton Tail Easter Egg Stickers suits perfectly for inside the card

Step 10
Run some green ink around the edges - and Card 1 all done
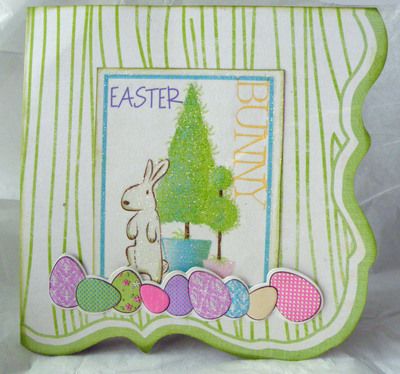
Card 2
I've kinda left this card front a little more plain than Card 1, there's a reason for that.... check out the next photo...
Inside Card 2 -
Isnt if fabulous! Tells a whole story in there all by itself! There's a lot going on with the inside of the card so I didnt want to overdo the cover of the card.
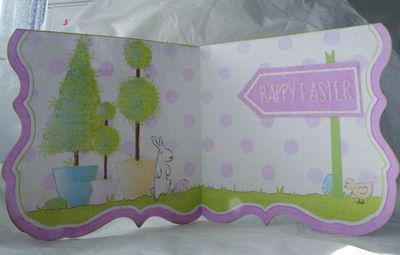
The only thing I've added is a strip of Simply Spring 'Grass'Cardstock for a 'post' and one of the glitter cut outs of the Cotton Tail Glitter Sentiments for the sign
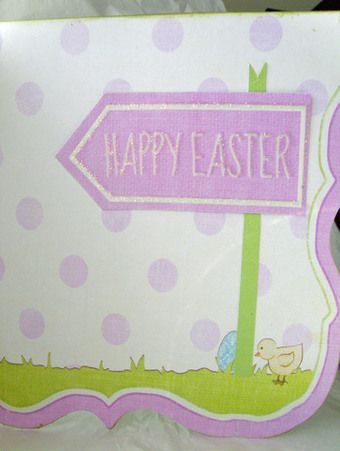
I hope you've found some inspiration to get those Easter Cards done!
This time 'Easter Bunny' features with WeRMemory Keepers and by using one 12x12 diecut paper, two shaped cards are formed.
Step 1
Cut Cotton Tail English Garden Diecut 12x12 in half
Step 2
Fold in half
Step 3
Using Cotton Tail Glitter Sentiments 12 x12 - cut out the little oval window block for the first card, (and the little bunny block to the left of it as this is for the second card) Cut out the little oval centre, and keep it aside - we need that for bunny's little bottom!
Step 4
Cut out a little rectangle piece of Simply Spring 'Grass'Cardstock (its to back the oval window)
Step 5
Have a little 'fiddle' where the paper piecing would go. No sticking down... Turn the little cut out oval piece over to its white side and place under the lower corner of the frame
I had this wonderful blue Cotton Tail Glitter Polka Dots paper - and cut out a little glitter dot - just for his tail! ( its not a waste of a 12x12 sheet because I'll use this paper for something else and cover that little dot space up with a photo or something
Step 6
Time to use those fabby Easter Rubons using the green 'Easter' word and the blue 'bunny' word.
Step 7
Try measure up where the words would go, rub them on and start to stick down.
Step 8
Cut out some little white oval feet and tiny pink soles to go on the inside of the feet, then dangle them just outside the hole. Add a lace bow and a line of Easter Egg Stickers
Step 9
A sentiment from the Cotton Tail Easter Egg Stickers suits perfectly for inside the card
Step 10
Run some green ink around the edges - and Card 1 all done
Card 2
I've kinda left this card front a little more plain than Card 1, there's a reason for that.... check out the next photo...
Inside Card 2 -
Isnt if fabulous! Tells a whole story in there all by itself! There's a lot going on with the inside of the card so I didnt want to overdo the cover of the card.
The only thing I've added is a strip of Simply Spring 'Grass'Cardstock for a 'post' and one of the glitter cut outs of the Cotton Tail Glitter Sentiments for the sign
I hope you've found some inspiration to get those Easter Cards done!
---------------------------------------------------------------
Julie
With Easter coming up I thought that I would make something
to decorate the chairs for our Easter dinner table.
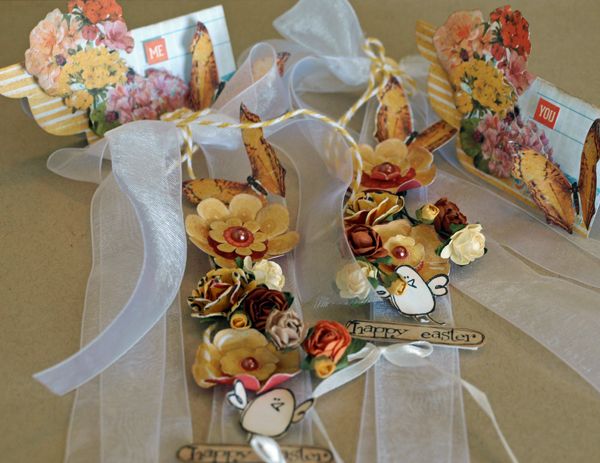
Here is what I came up with.

Not what I had in mind from the start but I love how they have turned out.
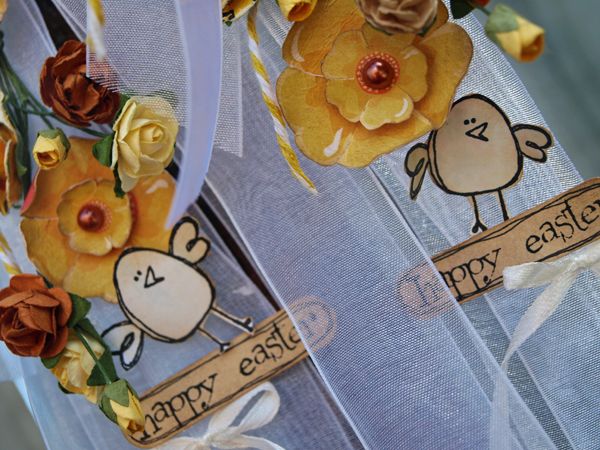
And to go with them I have made up two simple place cards using the Prima notecards that I cut out the butterflies from.
Using
MME Collectable Cute petite paper, matching sheet from the 6x6 paper pad and Tiny word stickers.
MME Twine
Prima Zephyr Note cards and flowers.
Can't wait to start setting up my Easter table.
Here is what I came up with.
Not what I had in mind from the start but I love how they have turned out.
And to go with them I have made up two simple place cards using the Prima notecards that I cut out the butterflies from.
Using
MME Collectable Cute petite paper, matching sheet from the 6x6 paper pad and Tiny word stickers.
MME Twine
Prima Zephyr Note cards and flowers.
Can't wait to start setting up my Easter table.
Note:
If you find any of the products have sold out due to being popular, send Lee-Anne a message and find out if it can be made available soon!
If you find any of the products have sold out due to being popular, send Lee-Anne a message and find out if it can be made available soon!
------------------------------------------------------
Don't forget to join in for the $50 shop voucher with our
MARCH BLOG SKETCH Challenge!!!!
Just CLICK HERE!!
Don't forget to join in for the $50 shop voucher with our
MARCH BLOG SKETCH Challenge!!!!
Just CLICK HERE!!
We'd love to see you interpretation!
No comments:
Post a Comment