
Inset Peacock Card

Now for a very long and hopefully very helpful detailed step by step for you all.
Step One - make your background paper - you can of course skip this step and just use a piece of patterned paper you have laying around however wanted to share this fun technique with you all.

- An old cutting mat (or 3)
- Gloss Photo Paper
- Shaving Cream - Cheap Coles Brand works
- Skewer or similar
- Paper Towel and Tissues
- Favorite 2 or 3 Distress Ink - I used
Peacock Feathers and Chipped Sapphire
- Some watercolour paper for different effect.

Spray the shaving cream on the mat (or a throw away plate works too) about 6 x 4 in size and spread out a little bit - it is easier to do this if you hold the mat upright and spray the can vertically than to try and spray down onto the mat - just does not foam as well if the can is horizontal

Randomly add drops of ink to the pile of shaving cream, grab the timber skewer or knife or whatever you choose to use and drag it through the foam crisscrossing it all over the place so you end up with something looking like this


Next step - Take you photo paper. lay over the shaving cream and gently tap the paper into the cream - This much ink and shaving cream will make bundles - while you are making a mess might as take advantage and make a bundle - I use the glossy photo paper of the first because you will see from the photos down lower, the more you go the more the ink blends together and each piece will be a completely different effect

As you go lay all the pieces of paper out with shaving cream in place to let it sit for a minute or two - I honestly can not tell you why shaving cream does this but it magically allows a water based ink to mark the gloss photo paper - I have tried applying the Tim Holtz inks directly to the photo paper and it just does not work.

Grab your paper towel and start to whip off the majority of the shaving cream mix - set the paper aside for a little longer and when you have nearly all the shaving cream whipped off grab a couple of tissues and just clean up the last of it - you can just use tissues for this step but you will use insane amounts, found paper towel just works better to start with.
Make sure you wash off your craft mat in the laundry tub or under an outside hose.
 | |||||||||||||||||
| And this is the end result of making your own backing papers - the ones of the left are on Photo Gloss Paper the ones of the right are on Watercolour Paper. The less blended ones are the first ones dipped on the shaving cream mix - the ones that are more blended (top left) are the last ones. I would not use these for scrapbooking - really dont know if they would be acid free but given what effect the shaving cream has on the photo paper of allowing the ink to colour it I am not sure what it would do if it came in contact with an actual photo. *********************************************** |

- Black and Coloured Cardstock cut to 6x6 inch
- Bigshot or similar
- Cutting Plates with Bigshot Metal Shim added.

Take the colour card, work out the placement of where you want the peacock to be when you are finished the card and run it through the bigshot or cuttlebug

This is a wafer thin die which is not specially designed for the bigshop however will work well in either the bigshot or cuttlebug and probably other die cutting machines when you add the metal shim from Cheery Lynn, it just gives a clearer more defined cut. **Please note if you are using a Cuttlebug you need the smaller shim plate
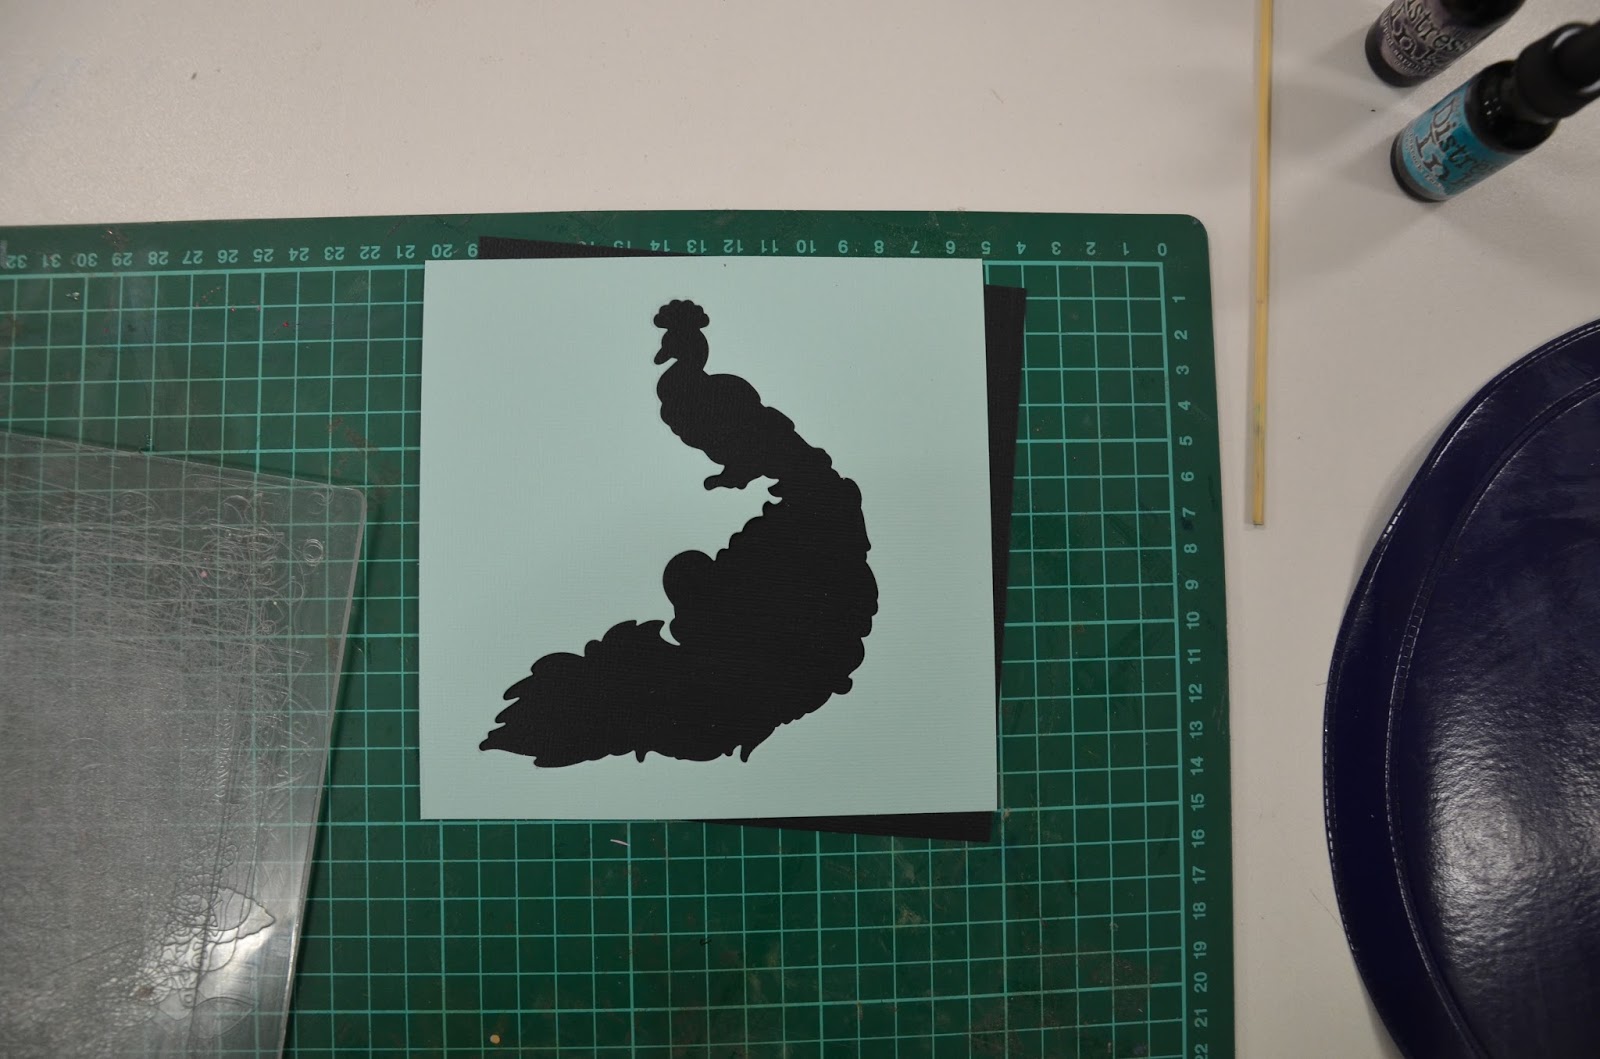
This is what we end up with - just put the black behind for a clear defined picture. Put aside the actual peacock from out of the middle - you may use it for another project but for now what we would usually throw away is what we want to keep

Repeat the process with the black cardstock this time we want to keep the black peacock - same thing keep the leftover - you may use that for another card. If you find all those fiddly bit a bit hard to get out the Spellbinder Tool-in-One works a treat

Now to colour in your peacock - ingredients here are Viva Paint, Glitter Embossing Powder, Heat Gun, Paint brush and some throw away plastic (because the viva paint sticks hard to everything.

The Viva Paint is very very good at covering colour - just paint it one with a paintbrush - I have left the actual peacock black and only painted the tail and the very tip of his head feathers


Heat set the embossing powder - this will dry the paint a bit quicker as well - when I am heat setting I fold an old sheet up and put in on the bench so you are not heating directly onto laminate or similar surface
*******************************************************

Step 3 Assemble the card
To be honest this all started because I do not fussy cut well - I was scrapping with a friend and saw her doing this technique - genius - no more fussy cutting
Osmer Dot Glue Runner

Move the paper you have made around under the die until you get it about where you think it needs to sit - don't worry is it sticks out on an angle as this will be trimmed down later anyway

Add the killer red to the outer edge of the paper going under the cutout - I have used the non-gloss ones that I did on watercolour paper - the glossy photo paper ones were just a bit too much with all that glitter and shiny paint on the peacocks tail, run the dot tape around edge of the cut out and glue together

Turn the painted peacock upside down and using the Osmer Glue Dot Runner add some dots of tape to the back of the peacock. Make sure you hold it firmly down while you run the tape accross. Alternatively if you are really good with applying glue to fine intricate dies then go that way

Starting with the tail carefully place the peacock into the "hole" holding the other end high so you can lay it carefully as you go up. Once it is all in give it a gentle rub over with your fingertip - this will push it well into place and also rub off any excess dot tape left behind

Pop a very small dot of ink onto your working surface or a disposable plastic bag - add some Dimensional Magic or Glossy Accents and stir, giving a final result of coloured dimensional magic

Using a paintbrush stir and pick up the mix and lightly bad it into the holes on the peacock tail - you will end up with a result like below - honestly in hindsight I went a little too heavy on the ink however it still turned out ok

And from here all that is left to do is to stick your card all together - decorate it as you see fit and you are all done.
Happy Crafting
2 comments:
Perfecto tutorial!! una tecnica muy bonita!! te sigo!
Wow! Love how you achieved that peacock! Great tutorial. Thanks for sharing!
Louise xo
Post a Comment