
Weeeeell before we know it, Easter will be upon us and its
early this year being end of March.
So lets start thinking about getting cards ready and when it arrives -
voilà - 'all organised'
So lets start thinking about getting cards ready and when it arrives -
voilà - 'all organised'
MANDY
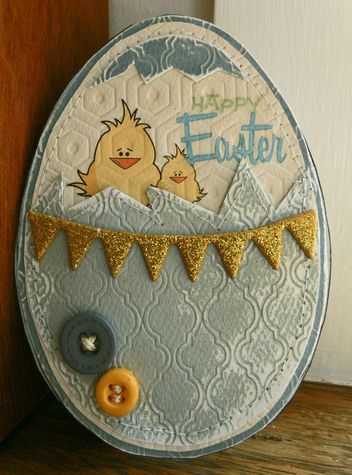
This week I've made a little 'EGG' card... it really was quite easy.
For the face of the card....I've cut out two sizes of egg shapes (I did have old templates cut out in my 'easter box' here at home- so used those - you can do a search and get some templates off the net or you can even get away with oval shapes )
however - there might be two sizes, but there needs to be three eggs cut
out..... one bigger, and two the same size:
)
however - there might be two sizes, but there needs to be three eggs cut
out..... one bigger, and two the same size:
I love the products I've used which are mostly MME Lost&Found 3 Oliver
For the one bigger 'egg' I've used the darker side of MME Oliver Blue Quatrefoil Paper and one slightly smaller 'egg' from the reverse side which is lighter blue (both blues are looking quite 'grey' at in the pic though, they are 'blue-r... prettier!) Cut another of the smaller sized egg from MME Oliver Yellow Honeyusing the reverse side which is the off-white
It's now a matter of placing the off-white egg on top of the darker blue bigger size.... Cut a 'crack' through the ligher blue egg - and sew (either with machine or draw stitches) across the 'cracked edge. THe coolest thing about this 'patterny embossed' paper is that it SANDS really well - so it gave a bit of definition by sanding down one side.
Attach all the 'eggs' together and sew around the oval edge. With the little 'cracked' paper left over - cut it smaller with another 'cracked' edge and pop it up the top (dark side up) so it looks like a 'lid'....
NOW for the decoration....
the gold glitter trim is awesome its MME Oliver 12x12 Chipboard and add a couple of- MME Oliver Buttons
Now to the rub-ons... quite the little story! Its probably well known that rubons and I just dont get along (I dunno - they just seem to stuff-up on me ) however, way back in 2008 I did a
Easter project class for little boxes here at Scrap Therapy (as a customer - not
on the dt) and the kit arrived and there they were 'RUBONS'! We were led through
the class one night by a dt member - it was fun and I did manage to use the
rubons somewhat successfully for once!
) however, way back in 2008 I did a
Easter project class for little boxes here at Scrap Therapy (as a customer - not
on the dt) and the kit arrived and there they were 'RUBONS'! We were led through
the class one night by a dt member - it was fun and I did manage to use the
rubons somewhat successfully for once!
Weeeeeeeeeeeeeell, in my Easter box last night - I found the remainder of those rubons - its been 5 years!!! They looked cute - and had to ask myself could they possibly still be 'okay' to use??
And looky - here they are .... those sweet little chickies on my 'Egg Card' below worked a treat and the 'Happy Easter' title... AND guess what
 You can STILL get them in the shop!
I have NO idea if Lee-Anne has 1 packet or 2 or 3 but they are super gorgeous
and adhere well.... you can find them HERE
You can STILL get them in the shop!
I have NO idea if Lee-Anne has 1 packet or 2 or 3 but they are super gorgeous
and adhere well.... you can find them HERE
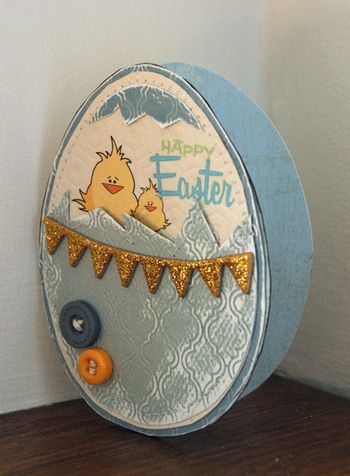
Last thing that needs doing is to back them onto some cardstock so it can be opened and written in... Or you could use it as a tag!
HOpe you have fun making up your easter cards!!! Lets get started
This week I've made a little 'EGG' card... it really was quite easy.
For the face of the card....I've cut out two sizes of egg shapes (I did have old templates cut out in my 'easter box' here at home- so used those - you can do a search and get some templates off the net or you can even get away with oval shapes
I love the products I've used which are mostly MME Lost&Found 3 Oliver
For the one bigger 'egg' I've used the darker side of MME Oliver Blue Quatrefoil Paper and one slightly smaller 'egg' from the reverse side which is lighter blue (both blues are looking quite 'grey' at in the pic though, they are 'blue-r... prettier!) Cut another of the smaller sized egg from MME Oliver Yellow Honeyusing the reverse side which is the off-white
It's now a matter of placing the off-white egg on top of the darker blue bigger size.... Cut a 'crack' through the ligher blue egg - and sew (either with machine or draw stitches) across the 'cracked edge. THe coolest thing about this 'patterny embossed' paper is that it SANDS really well - so it gave a bit of definition by sanding down one side.
Attach all the 'eggs' together and sew around the oval edge. With the little 'cracked' paper left over - cut it smaller with another 'cracked' edge and pop it up the top (dark side up) so it looks like a 'lid'....
NOW for the decoration....
the gold glitter trim is awesome its MME Oliver 12x12 Chipboard and add a couple of- MME Oliver Buttons
Now to the rub-ons... quite the little story! Its probably well known that rubons and I just dont get along (I dunno - they just seem to stuff-up on me
Weeeeeeeeeeeeeell, in my Easter box last night - I found the remainder of those rubons - its been 5 years!!! They looked cute - and had to ask myself could they possibly still be 'okay' to use??
And looky - here they are .... those sweet little chickies on my 'Egg Card' below worked a treat and the 'Happy Easter' title... AND guess what
Last thing that needs doing is to back them onto some cardstock so it can be opened and written in... Or you could use it as a tag!
HOpe you have fun making up your easter cards!!! Lets get started
-----------------------------------------------------------
KAREN
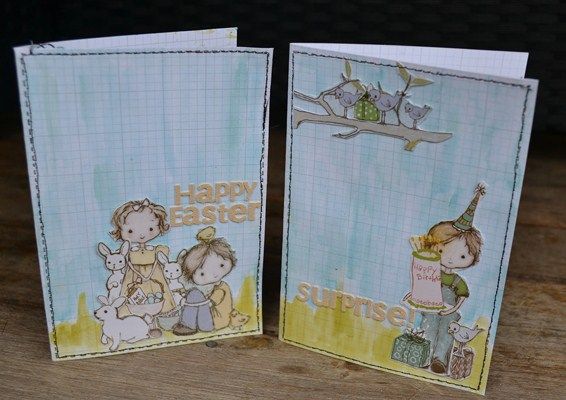
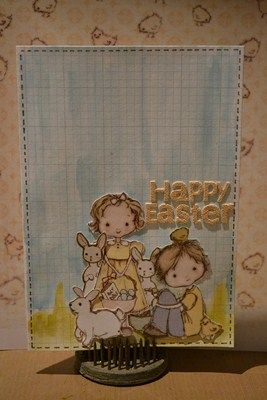
I cards to share with you this week. I have a bit of a soft spot for the Prima
Jack and Jill Range, even though it's one of their older ones.. So i thought i'd
use a little of it to make my cards. ( the Happy Birthday one is for Ash to give
his Daddy for his birthday next week.)
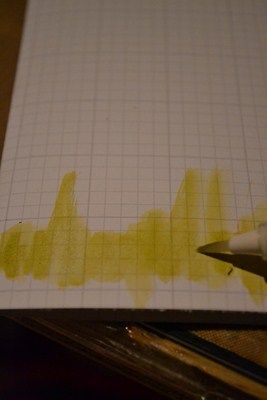
I have made my background using Tim Holtz Distress Markers and a water brush. It's really easy to do. Here are some easy steps to make your own. We are wanting for it to look like it's been water coloured, so you dont have to be nice and neat.
1. Scribble you chosen background colour down directly onto your craft sheet.
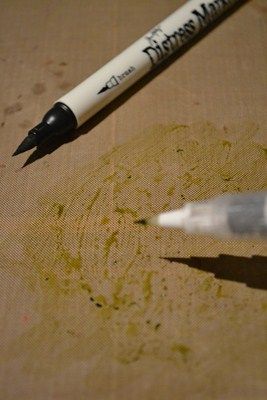
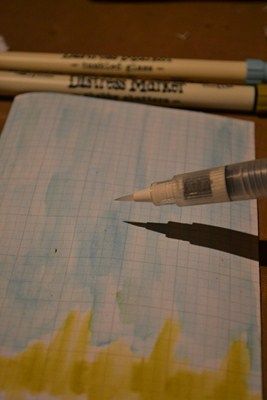
2. Making sure your water brush is filled with water, and not to wet on the bristles, pick up your distress marker colour off your craft sheet and colour onto your card background. I dry inbetween each layer with my heat gun if i'm using more than one colour..
4.Add in your embelishments and greeting. I have fussy cut the little figures of Jack, Jill, and the other assorted images.. It takes a little bit of time, and is a bit fiddly, but i think they look so cute.
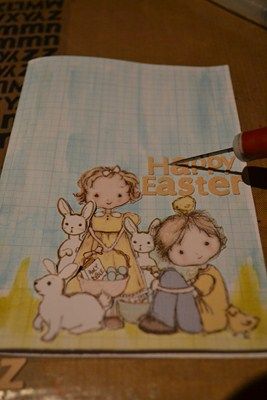
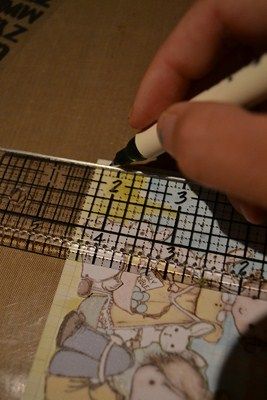
5. I have also used my distress markers to draw in a stitched border. I ended up adding in a stitched border with my sewing machine as well, I wanted a little bit more texture to it.
And you're done
Products Used:
Tim Holtz Distress Markers
Tim Holtz waterbrush
Prima Jack and Jill Birthday Paper - Jack
Prima Jack and Jill Paper - Easter Jill
Sn@p just the Basics pages
This is what i used for my grid paper card base.
The exact colour of Prima alphas stickers I used are sold out, but there are some gorgeous colours left like these ones
I have made my background using Tim Holtz Distress Markers and a water brush. It's really easy to do. Here are some easy steps to make your own. We are wanting for it to look like it's been water coloured, so you dont have to be nice and neat.
1. Scribble you chosen background colour down directly onto your craft sheet.
2. Making sure your water brush is filled with water, and not to wet on the bristles, pick up your distress marker colour off your craft sheet and colour onto your card background. I dry inbetween each layer with my heat gun if i'm using more than one colour..
4.Add in your embelishments and greeting. I have fussy cut the little figures of Jack, Jill, and the other assorted images.. It takes a little bit of time, and is a bit fiddly, but i think they look so cute.
5. I have also used my distress markers to draw in a stitched border. I ended up adding in a stitched border with my sewing machine as well, I wanted a little bit more texture to it.
And you're done
Products Used:
Tim Holtz Distress Markers
Tim Holtz waterbrush
Prima Jack and Jill Birthday Paper - Jack
Prima Jack and Jill Paper - Easter Jill
Sn@p just the Basics pages
This is what i used for my grid paper card base.
The exact colour of Prima alphas stickers I used are sold out, but there are some gorgeous colours left like these ones
-------------------------------------------------------------------
JULIE
has a wonderful stamping challenge attached to this LO
CLICK HERE to see the criteria and take part in the forum.
Here is my sample layout using Distress inks and
Marvy markers.
BFF
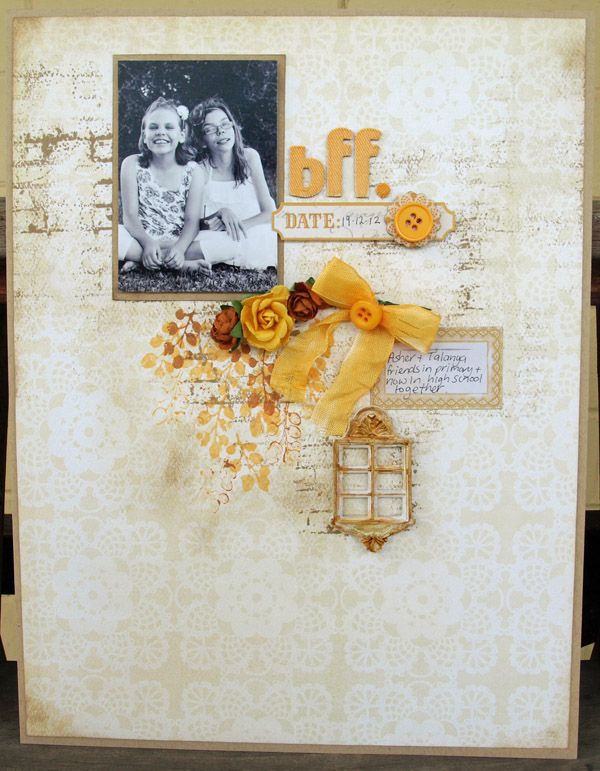
Using My minds eye Lost and found 3 Oliver Yellow floral 12x12 paper, 6x6 paper pad, buttons, Oliver sticker sheet.
WRMK Good day sunshine clear stamp.
Thickers.
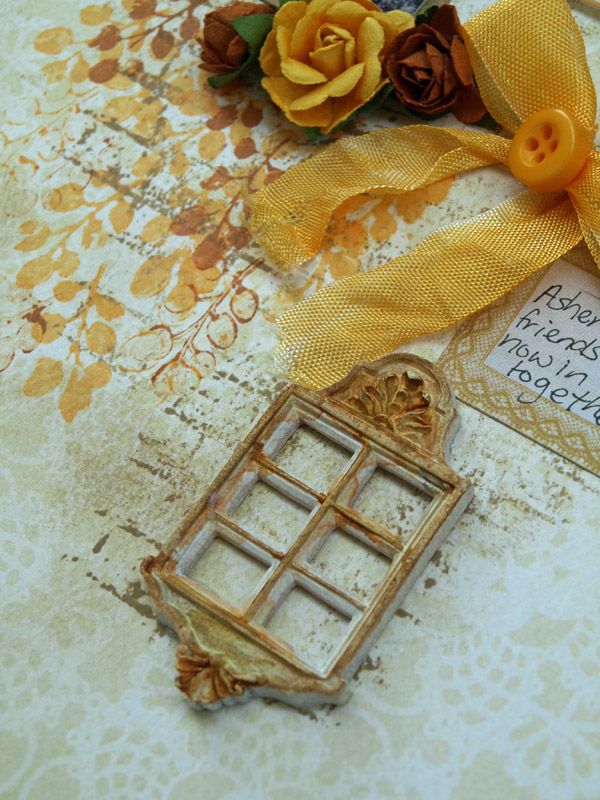
Tim Holtz, Distress ink Frayed burlap and brick stamp.
Prima Resin.
Marvy Uchinda Markers
BFF
Using My minds eye Lost and found 3 Oliver Yellow floral 12x12 paper, 6x6 paper pad, buttons, Oliver sticker sheet.
WRMK Good day sunshine clear stamp.
Thickers.
Tim Holtz, Distress ink Frayed burlap and brick stamp.
Prima Resin.
Marvy Uchinda Markers
--------------------------------------------
Dont forget to take part in our
due end of month!
--------------------------
2 comments:
You girls ALWAYS inspire me...such a variety of ideas & techniques & tips to get me motivated - THANK YOU:):):)
Oh my. This is beautiful. Such dainty details, all so wonderfully balanced!
Post a Comment